Tag

cheese

Cedar Plank Brie with Peaches & Thyme

By Cedar Plank Recipes, Cheese, Fruit, Recipes
Soft cheeses with a rind are a fantastic option for cedar plank grilling. The outer rind of Brie, a soft cow’s-milk cheese that’s named after the district in France where it originated, is meant to be eaten.

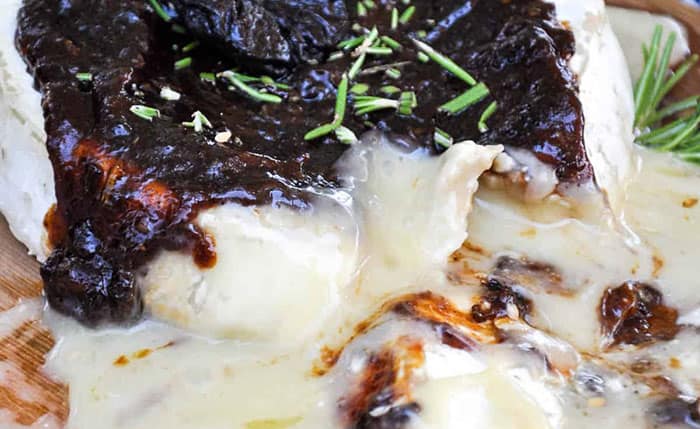
Cedar plank grilling enhances the nutty, earthy flavour and character of the cheese. Plank grilling adds a subtle hint of smokiness to the dish while the cheese turns soft, warm, gooey and melty.

You’ll need

• 1 cedar plank
• Loaf of baguette style French bread
• ¼ cup of extra-virgin olive oil
• 2 tsp chopped fresh thyme
• 1 cloves minced garlic
• ½ cup apricot preserves
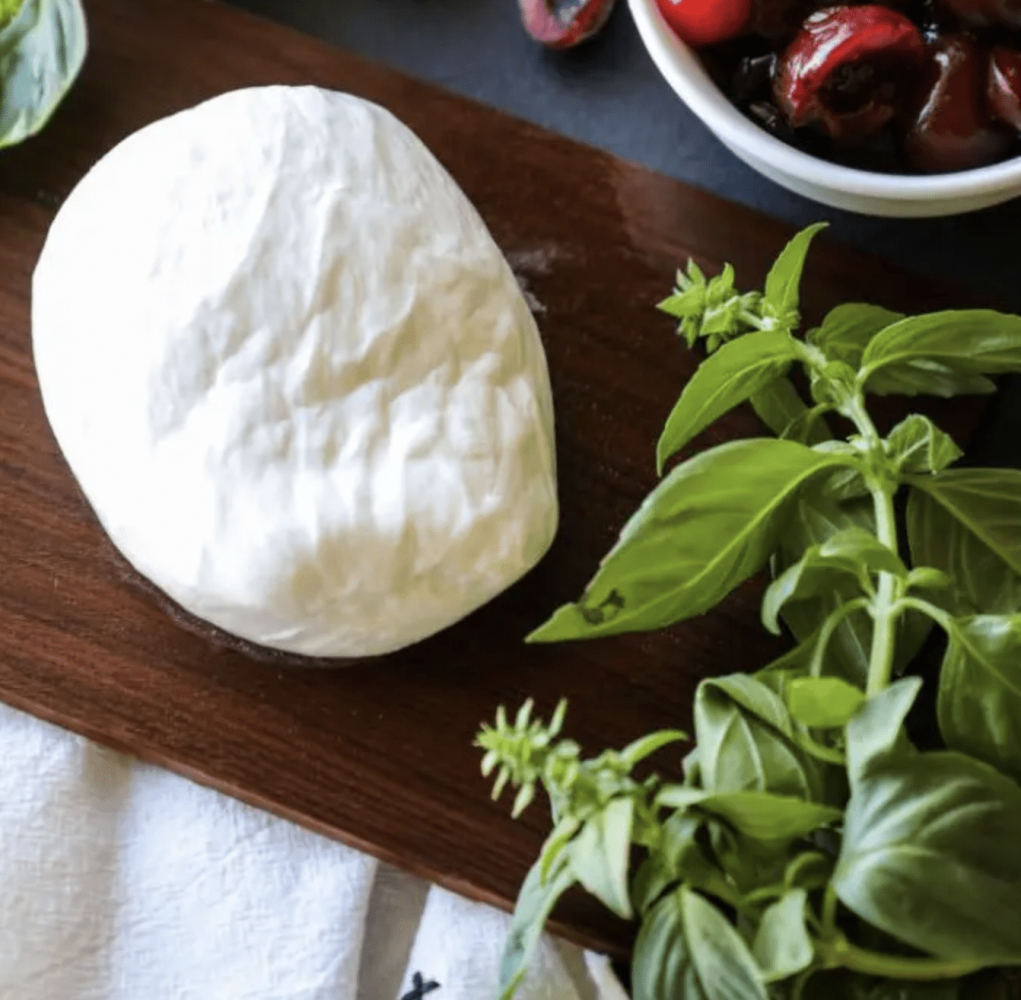
• 1 x wheel of Brie cheese at room temperature
• 1 x peach pitted & sliced
• 1 x plum pitted & sliced
• ¼ tsp sea salt
• ¼ tsp ground black pepper
• Fresh thyme sprigs

Step 1:
Soak your cedar gourmet grilling plank in water for at least 30 minutes.

Step 2:

Slice the bread diagonally into sixteen 1/4-inch slices.

Step 3:

For the herb oil, in a small bowl combine olive oil, thyme and garlic; set aside.

Step 4:

In a small saucepan, heat preserves until melted; cover and keep warm.

Step 5:

Heat grill to medium-high heat over direct heat. Place your plank on grill. Cover the grill and preheat plank for about 5 minutes, turning once. Pre-heating the plank allows it to begin releasing smoke and flavour.

Step 6:

Place Brie on preheated plank. Brush with some of the melted preserves.

Step 7:

Arrange the peach and plum slices on grill grate around plank. Cover and grill for 2 to 3 minutes or until fruit slices are slightly charred, turning once.

Arrange a few slices of peaches and plums on top of Brie. Add remaining fruit slices to plank around Brie. Brush remaining melted preserves over fruit.

Step 8:

Cover and grill for 10 to 15 minutes more or until Brie is melted. Remove plank from grill. Let stand while grilling toasts.

For the toasts, lightly brush baguette slices with herb oil; sprinkle with salt and pepper.

Place baguette slices on grill rack over direct heat. Grill for 3 minutes or until crisp and golden on both sides, turning once. Remove from grill.

Serve melted Brie on toasts, top with the fruit and enjoy!

Smoked Burrata Smoked on a Natural Wood Plank

Smoked Burrata Smoked on a Natural Wood Plank

By Cedar Plank Recipes, Cheese, Recipes

This is the perfect way to wow your guests and indulge on a perfect ball of burrata. Okay, let’s first explain what burrata is. Some call it the Queen of Italian cheeses and translated from Italian, burrata means buttery. That’s a clue to the delicious melt-in-your-mouth centre that awaits inside.

This amazing semi-soft cheese is made by artisans with just three simple ingredients: cow’s milk, rennet, and cream. Just as fresh, mild and creamy, mozzarella bears a close resemblance to burrata in both flavour and ingredients. Feel free to substitute it if you can’t find the real thing. The purpose of cedar planking this type of cheese is to add a light smoky flavour without really cooking or melting the cheese.

Cedar Planked Smoked Burrata – Serves 2

You’ll need:

  • 1 well-soaked cedar plank
  • 1 Ball of burrata cheese
  • Salt & Pepper
  • Some Olive Oil
  • Fresh basil for garnish

Step 1:
Soak the cedar plank in water for at least 30 minutes prior to grilling.

Step 2:
Preheat your grill to medium- high heat on one side.

Step 3:
Remove the ball of burrata from the package and discard the water. Pat it dry and place it on the cedar plank.

Step 4:
Place the plank over a medium heat grill and close the lid to cook for 2 minutes. Check to see the plank is smoking and the burrata is not melting. The burrata should not melt during this cook, just get warm and smoke infused. Cook an additional 1-3 minutes to smoke infuse as needed and carefully take it off the grill.

Step 5:
Plate the burrata with a little drizzle of olive oil, salt, pepper, and garnish with fresh basil.

If you’ve had burrata before, you’re probably wondering how to grill this cheese without making a huge mess. If you’re careful and determined, it is possible. Just don’t grill it for too long or at too high heat. Serve this gooey goodness with crackers or pita chips and add some grilled fruit like cherries, grapes, or berries to make it even more exciting. You can also pop it onto a bowl of pasta and enjoy it as a main meal.

Cedar Planked Herbed Cream and Cheese Capsicums

Herbed Cream Cheese Capsicums Smoked on a Natural Wood Plank

By Cedar Plank Recipes, Cheese, Recipes

If you are looking for a colourful and tasty side dish or appetiser, these pepper boats with herbed cream cheese filling grilled on a cedar plank are a sure winner. If you serve about 6 of them to each person, you can call it a meal.

In this recipe we use basil, chives and coriander but feel free to use whatever herbs you have handy. Enjoy the creaminess from the filling, the bite from the garlic, the freshness from the herbs, plus the sweet crunch from the blackened peppers.

Cedar Planked Herbed Cream Cheese Capsicums – serves 4

You’ll need:

  • 1 large cedar plank
  • 250g cream cheese, softened
  • 1 or 2 garlic cloves, minced
  • 2 tbsp chopped fresh basil
  • 1 tbsp chopped fresh chives
  • 2 large red, yellow, or orange capsicums, seeded, and quartered
  • olive oil for brushing and drizzling
  • ½ cup chopped tomatoes
  • ¼ cup chopped fresh coriander (cilantro)

Step 1:
Soak the cedar plank for an hour, fully submerged in water, and prepare your grill to medium-high heat.

Step 2:
In a medium-sized bowl, beat the cream cheese until it’s lovely and smooth. Beat in the garlic, basil, and chives then set aside.

Step 3:
Brush the skin side of each capsicum quarter with olive oil. Put them on the soaked plank, spoon some cream cheese into the middle of each, making sure you don’t overstuff, then place the plank on the grill and cover. Grill for 5 minutes, or until the bottoms are scorched and the cheese has melted. Sprinkle them with chopped tomatoes, fresh coriander, and drizzle of olive oil then serve.

Filling and not spilling the quartered capsicums is the hardest part of this recipe, so unless you have a steady hand make sure to keep some paper towels handy. If you have some herbed cream cheese mix left over, it’s great on bagels for breakfast or spread it on your sandwiches for lunch.

Camembert on a grilling plank

Grilled Camembert or Brie Smoked on a Natural Wood Plank

By Cedar Plank Recipes, Cheese, Recipes

Looking for an appetiser that’s easy to make but will leave your guests talking for days? When you want a little more excitement than what you’d get from simply serving cheese and crackers, make this cheesy, gooey, slightly spicy surprise that’s ready to serve in less than 20 minutes.

Both Camembert and brie are perfect for grilling. Both cheeses have an earthy flavour and aroma. Brie is milder with a creamy, buttery taste, while Camembert is a little deeper, more earthy and intense. Fancy but easy, this cedar wood grilled French cheese delight is a perfect happy hour food for your next dinner party.

Cedar Planked Camembert or Brie – Serves 3 to 4 as an appetiser

You’ll need:

  • 1 cedar wood grilling plank
  • 1 whole small camembert or brie cheese
  • 3 tablespoons pepper jelly, tomato jam, or apricot jam
  • 1 to 2 large jalapeño peppers
  • Grilled bread or crackers for dipping

Step 1:
Set up your grill for smoke-roasting (indirect grilling) and preheat it to medium-high, no more than 180C. Place the plank directly on the grill grate and grill until it’s singed on both sides. Set aside and let it cool (this is optional, but it gives you a lot more flavour).

Step 2:
Using a sharp knife, score a deep cross or a crosshatch pattern on the top of the cheese so the air can escape while cooking.

Step 3:
Place the cheese in the centre of the plank and spread the top with the jam or jelly, using the back of a spoon. Slice the jalapeños longways ad place them on top so the slices overlap to make a decorative pattern.

Step 4:
Place the plank on the grill away from direct heat and smoke-roast the cheese until the top browns, the sides are soft, and it’s beginning to melt. That should take no more than 8 to 10 minutes.

Step 5:
Serve the grilled camembert or brie on the plank hot off the grill with grilled bread slices or some fancy crackers. Vegetable sticks are a good pairing, too.

Serve this deliciousness with a glass of red or white French wine, or opt for a quality New Zealand vino as it’s just as good. Trust us, it’d be hard to find an appetiser that’s tastier than this.

Pizza on a cedar grilling plank

Pizza Smoked on a Natural Wood Plank

By Cedar Plank Recipes, Meat, Other, Recipes

Pizza is one of those foods that holds a special place in pretty much everyone’s hungry hearts. It combines a crispy crust that’s drenched in savoury sauce and underneath a pile of yummy toppings and gooey melted cheese. It really doesn’t get much better than that.

Whether you like your slices plain, piled high with pepperoni or topped with a load of tasty veggies, the possibilities are endless when it comes to dressing up your pie in something that suits your personal taste. If pineapple belongs on there is debatable, of course.

If you like wood fired pizzas from the oven, give cedar plank grilling a try. The cedar plank adds a nice smoky flavour to the crust while also protecting the dough from the grill. It makes for a fun and rustic presentation with a difference.

You’ll need:

  • A store-bought pizza base from the deli or you can make your own
  • Your favourite toppings

Step 1:
Soak your cedar wood planks for an hour before using. They need to be soaked so they don’t catch fire while grilling.

Step 2:
Drizzle the plank with a bit of olive oil and spread around, then add cornmeal. This makes it less likely for your pizza to stick.

Step 3:
Place the dough onto the plank and have all the toppings ready by the grill before you get started.

Step 4:
Heat your grill up to approximately 200 degrees, creating direct and indirect zones.

Step 5:
Place the cedar planked pizzas on the indirect side and let the dough cook for about 5 to 7 minutes so the top has a chance to bake before adding toppings. Next, add the toppings and let the pizza continue to cook for another 10 minutes until the cheese has melted and the crust is golden brown.

Step 6:
Remove the pizza from the grill, slice into pieces, and serve.

You can use the cedar planks as a serving tray for presentation if you like, but make sure they are slightly cooled if you do.

Grilled peaches on a cedar plank on the bbq

Peaches Smoked on a Natural Wood Plank

By Cedar Plank Recipes, Dessert, Fruit, Recipes

Who said that cedar plank grilling is for fish and meat fans only? This versatile style of cooking can be used for sweet treats, too! How does peaches with mascarpone, pistachios, and honey with a sweet woodsy flavour sound? If you’ve never grilled fruit before, give it a try.

Grilling fruit is great way to enhance the naturally sweet flavour as the heat from the grill gives the outer edges a beautiful touch of caramelisation. Do it on a cedar plank and you’ll have a delicious dessert that’s easy to prepare with a stunning presentation.

Cedar plank peaches – Serves 8

You’ll need:

  • 4 peaches, halved and pits removed
  • A little oil
  • Your cedar wood planks (soaked)
  • ½ cup mascarpone cheese
  • ¼ cup honey
  • ½ cup chopped pistachio nuts
  • 1 tbsp ground cinnamon

Step 1:

Soak your cedar wood plank for at least 20 minutes and heat the grill or oven to 230 C.

Step 2:

Halve the peaches and remove their seeds. Put the hales on the cedar plank, brush then with a little bit of oil and grill until golden brown. They will be cooked through and nicely smoked in about 30 minutes.

Step 3:

Place them on the dessert plates for serving and place one tbsp mascarpone, a drizzle of honey, 1 tbsp of chopped pistachios and a sprinkle of ground cinnamon on top. It’s that easy.

This dessert is a spectacular finish to a great dinner, and the recipe works well with any type of stone fruit. When those are out of season, you could try it with Nashi pears instead. For a dairy-free version, you can swap out the mascarpone with coconut yoghurt. Deliciousness is guaranteed.

Oysters on a cedar grilling plank

Miso Baked Oysters Smoked on a Natural Wood Plank

By Cedar Plank Recipes, Recipes, Seafood

They are an acquired taste but if you’re a fan of oysters stay with me. Then again, this recipe is so good that it could even turn an oyster-phobic around. It’s because they are slathered in miso mayonnaise.

Miso paste is available in most supermarkets and if you can’t find it there you could head to your nearest Asian store. Miso paste is made with fermented soya beans. It’s salty, delicious, and a staple ingredient in Japanese cooking. The texture is a bit like peanut butter and miso can be smooth or chunky. The fermentation process can take from a few weeks to several years.

Mixing mayonnaise and miso and using it as a glaze for grilled seafood is an old Japanese trick called Motoyaki. The rich flavours of the ingredients compliment the sweetness of the baked oyster.

Japanese Miso Baked Oysters – Serves 4 as an appetiser

You’ll need:

  • 8-12 Oysters, shucked, shells reserved if using to bake oysters in ¾ cup Japanese (Kewpie) or regular mayonnaise
  • 2 tbsp Miso paste
  • 1 tbsp Mirin
  • 5 dashes of Tabasco or other hot sauce
  • 2 tbsp fresh lemon juice
  • 1 ½ cup shredded fresh spinach
  • ½ cup shredded cheddar or mozzarella cheese
  • Some wedges of lemon and a sprinkling of parsley and/or paprika for garnish

Step 1:
Pre-soak your Cedar Wood plank, scrubbed the oysters and rinse them well to remove excess grit and potential bugs from the shell, and preheat the barbeque to high.

Step 2:
Set out oyster shells, help them stay upright and stable by placing them on a bed of rock salt.

Step 3:
Mix the mayonnaise into miso paste, then add mirin, hot sauce and lemon juice and stir until well mixed. If you are using regular mayo instead of the Japanese one, add a bit more lemon juice.

Step 4:
Divide the shredded spinach equally between the shells and top it with the oysters. If you are using large oysters, you can cut them into 2-4 pieces each so they are easier to eat. Spoon approximately 1 tbsp miso mayo sauce over each one and then sprinkle with cheese.

Step 5:
Place the pre-soaked plank with the oysters on it on the hot grill. When bubbling there’s a beautiful caramel colour on top, your oysters are cooked. It’ll take approximately 5-8 minutes.

These delicious cedar plank grilled oysters are perfect for pairing with beer and sake. Enjoy, andとんでもない, Tondemonai, you’re welcome.

Cheese on a cedar grilling plank

Brie with Prune Rosemary Sauce Smoked on a Natural Wood Plank

By Cedar Plank Recipes, Cheese, Recipes

If you’ve never tried baking brie before, you’ve got to try it! It’s the easiest thing to do and it becomes all melty and yum. A cedar plank is the perfect foundation for this gooey appetizer. It infuses a smoky flavour into the cheese and doubles as a rustic serving tray.

The dried plums infuse more flavour while the rosemary along with barbecue sauce adds just enough tang to balance it all out. The rind of the brie acts as an organic container until the flesh is pierced to release the warmed cheese, flooding the cedar plank with its creamy goodness.

Cedar Planked Brie topped with Dried Plum Rosemary Sauce – serves 3-4

You’ll need:

  • 200g dried plums
  • ½ cup water
  • ¼ cup maple syrup
  • ¼ cup barbecue sauce
  • 1 tsp fresh chopped rosemary
  • 2 brie cheese wheels

Step 1:
Soak your cedar plank for at least an hour and preheat the grill.

Step 2:
Place the dried plums and water in a food processor until blended. Add the maple syrup and barbecue sauce and blend until smooth and well combined.

Step 3:
Place the sauce into a small saucepan and stir in the chopped rosemary. Heat it slowly through until it’s simmering, then simmer for 10 more minutes.

Step 4:
Place the brie on the soaked plank and place on the hot grill and cook for 8-10 minutes.

Step 5:
Add the warmed sauce to the top of the cheese and allow to sit on grill a few more minutes.

Step 6:
Remove the cedar plank from grill and allow the cheese to sit a few minutes before serving.

Serve this gooey goodness with your favourite crackers or bread for dipping. If you can’t find dried plums or if the real thing is out of season, you can still make this fabulous dish. Just use a store-bought chutney instead. It works well as an entrée but can also be served as a scrumptious cheeseboard for dessert. It is rich, velvety and delicious.